Categories
Demolition

Week #10

Spring Break Week

Great progress last week! It was spring break for all the girl’s activities, so the days were clear to work. We notified our HOA and kept the bus in the driveway for the week.

Half the day was spent SCRUBBING the bus. It takes about 2-3 hours to scrub just a 4-5 ft section a day. The process was slow with the multiple trips to refresh the bucket of cleaning water. There was also gum/adhesive residue where all the tracks for wheelchairs had been. That had to first be removed with Goo Gone, then washed off with soap.

Only Day 3 of cleaning

We used red Rustoleum paint to cover the bus floor and sides. We had a few folks lifting their eyebrows on our color choice. But since you wonā€™t be able to see it once the floor and walls are in, we chose this color because it stands out better than the available grey or black and shows the imperfections we need to fix. Once the floor had a coat of paint on it, we needed to fill the hundreds of holes that were caused by seats, wheelchair lift and tracks and the old plywood nails.

The small holes were filled with small rivets. We used 225 of those! The medium size holes were filled with large rivets. However, these were just not large enough and could still be moved. So, we pulled each one of those that were loose out, filled the hole with caulk and put the rivet back in. 175 of those. The bus floor looked like it had black measles, so we painted the rivets as well for esthetics.

Now what to do with the largest holes…

We donā€™t have many of them, just 8, but the rivets wonā€™t work for them and they are too large to just fill with caulk. So I asked the girls to raid the small-change-jar and get some pennies. I put the caulk around the edge of the hole and R put the penny on top. Problem solved. N wanted to know how much money we were spending, but I explained that the penny was actually cheaper then going to the store and buy rivets since those cost 12 cents each.

We had one larger hole where the wheelchair hydraulic hose had gone through. We filled that one by cutting a small plate out of some of the steel we had removed and riveted it over that hole. The same process was used for the holes left by the stop signs on the side of the bus. Now that it is all sealed, one more coat of paint and all is done.

Making the turn from demo to rebuild

Once the floor had been scrubbed, painted, and sealed, we proceeded to cover the floor with Ā½ā€ foam board. It is expensive but easy to use material. It should help reduce cold or hot air from the bottom of the bus, but mostly we hope it will considerably reduce the road noise. We cut the foam board with an Exacto knife. R wanted to help put the glue down (on our freshly cleaned and painted floor!) and we put the board on top. It is slow drying glue, so I asked the girls to lay on top of the foam to press it down. They basically worked while reading books. Canā€™t have it better than that!

And the next layer….

On Thursday, we went to our favorite lumber company, Lodge Lumber in Houston, to pick up 7 sheets of Ā½ā€ plywood. While there, we caught up with our friends and talked about the bus conversion project. We are thankful for their assistance since the prices at the large hardware chains severely tighten the budget of a conversion project. We spent the weekend cutting the plywood to size and installing it on the bus.

Subflooring is in

Maritime Traditions

Before we closed the last section of floor up, we had our initiation ceremony. After all, we are a maritime family, so we do things the maritime way. We placed a gold coin, heads up, onto the bus floor to make it part of our foundation. In addition to the pennies in the floor, the bus now should at least have a trade in value of one dollar and 8 centsā€¦.

A family moment showing our appreciation for Lodge Lumber

In addition to all this, window cleaning continued. The week ended with only three more windows to wash. We hope to finish it in the coming week, in addition to screwing down the plywood. When the bus was brought back to storage, a huge difference in road noise was noted! Looks like the insulation is doing what it’s supposed to do!

Categories
Demolition

Week #9

All good plans

We ended last week with another episode of the bus not starting. Window cleaning continued, however, since that can be done at home. We went to the storage place on Saturday to exchange clean windows for more dirty ones. While there, we decided to make another attempt on trying to get the engine going. I put the key into the ignition, turned it to let the bus run through its starting sequence, manually switched through the transmissions (neutral, forward, reverse, back to neutral) and turned the key to startā€¦.

Guess the bus liked the nicer weather of the weekend, because its engine started without issue and was purring like never before! YAY! I called Cindy and she said to bring it home right away so we can get some real work done since next week was spring break.

Filthy filters and black oil

Now that it was home, it was cleaning and filter changing time. There are quite a few filters on this vehicle; a water separator filter, fuel filter, oil filter, cooling liquid filter and an air filter. Unlike with a gas engine, the main risk of changing fuel filters on a Diesel engine is air in the line. If for some reason you get air in the line, the engine will cut out immediately. I read up on how to change these filters without dousing the driveway in fuel prior to changing the water separator filter. Luckily, the filter tool arrived the very afternoon we brought the bus home. What would we do without Amazon.

After a little bit of searching, I find the manual fuel prime pump and the fuel filters are changed in just about an hour. Of course, we have a little cat-engine experience from our merchant mariner days. Started the engine and no issues.

Then it is time to crawl under the bus and change the oil. The engine takes either 6.5 gallons or 4.75 gallons of fuel. So was looking for a bucket that would fit that amount of oil. In the end, one of the bins with cots from underneath our bed was sacrificed.

Letting the oil pour out was not a big deal and neither was unscrewing the oil filter, but that is merely because engineering assistant Cindy walked by just in time to help and catch the filter without spilling oil everywhere!

Last but not least is the cooling water filter, but that is straight forward with two valves to block of the filter.

Getting the inside started!

Meanwhile, the cleaning process was started on the inside of the bus. The flooring and sides were SCRUBBED! By Sunday night, Ivo was able to paint rust prevention coat on the first 4ft section of flooring.

Spring break is next week, with the bus in the driveway. It’s starting to turn around from demolition to rebuild!

Categories
Demolition

Week #7/8

Week #7

Week #7 was a week of life with no work on the bus. With a fun surprise trip over the weekend, and serving with Meals on Wheels during the week, time just didn’t allow for it! It’s definitely going to be a balance between working on the conversion and living life with 3 girls in all sorts of activities (soccer and camping season are just weeks away)

Week #8 – Let there be light!

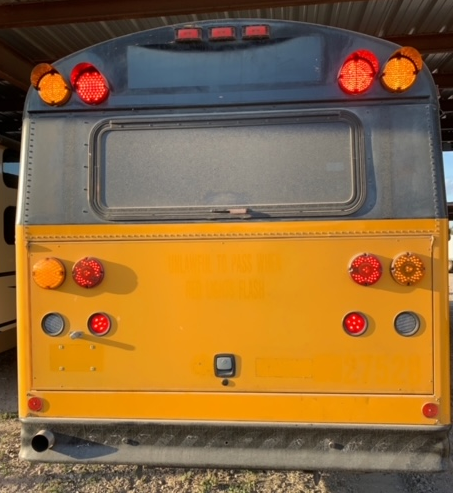
In the first week we had switched out the red and yellow school bus flashers. This week it is time to re-purpose those lights to use them in a non-school bus function. The yellow lights on front and back will become additional blinkers. The red lights in the back will become additional brake lights. The now two white lights up front will become spotlights on a separate switch.

Step #1

First step was trying to figure out if a school bus actually has hazard lights so we can plug into them, or if we need to install a hazard light solenoid. Maybe this a strange query, but logic would dictate that when a school bus is stopped in an emergency, the driver will just switch on the flashers we all know about. Those would then act as hazard lights. Which is why I never bothered to look for a hazard lights button when we drove back from Calexico. Ever since we got home, I have been searching for it thoughā€¦.

In the end, after reading many skoolie.com posts, I figure it has to be somewhere on the steering column. Unfortunately, no-one ever posted where exactly they eventually found it. As a result, I checked every half inch of the steering assembly. And still find nothing…

The discovery

While lying under the steering wheel, thinking how to solve the mystery of mysteries, I see a little half inch black square just behind the window wiper controls. Lo and behold, when I rubbed it down with my finger, the black grime came off. There was the little red button! I pressed on it. Even though it does not light up like the ones in a car do, I heard the solenoid start clicking!! I got out of the bus and looked at the front lights and yes, the hazard lights have been found! It’s these little things of joy that want me to run to the store and buy a superman suit!!

In case someone else runs into this issue: the picture, now with a clean red button, shows you where to find it. It is not visible from the driverā€™s seat, and you donā€™t really feel the hump if you slide your hand behind the wiper controls.

Step #2

Step two, find the most direct route to connect the top blinkers to the bottom blinkers. This proved to be fairly easy since there is a nice cove on both sides of the windshield where the wires can be run straight down to the bottom blinker. Had to drill one hole through the front dashboard and voila, the wires come out in the right place.

I first used wire clips from the kidsā€™ science kit to make the connection to ensure the wires were installed correctly. If you connect the blue and red wires of the yellow light fixtures opposite of their normal connection, you get blinkers instead of flashers. (who knew!) And blinkers are what we want. Connecting blue to red and red to blue did the trick. Of course, the wires I used to run down from the top to bottom are taken from the stack of previously removed wires, so they have a different color all together.

Add a few wire connectors, clean it up with some electrical tape, test, and success! (The only way to see them at work in this blog is by sliding the picture back and forth; lit ā€“ not lit ā€“ lit ā€“ not lit ā€“ lit ā€“ not lit)

Back lights – Blinkers

Here I needed assistance from our happy helpers. Installing the blinkers as I did before was not an issue. R helped by pressing the button while I connected the wire clips to the light to make sure they become blinkers.

Rear Brake lights

Next, we moved to the brake lights. R turned the key up front to the active position and I started the engine from the back. N stood next to the front door to relay messages to R over the noise of the engine and let her either press or release the brake pedal. She felt very important giving R instructions…

R pressed the brake while I moved the wire clips around until the top lights are working properly. Wire clips were replaced by connectors, added some tape and tie raps (or cable ties if you want to give it the American-English name) and the back was done as well.

Step #3

Last but not least, we have the front white lights. Those were connected separately and put on a dome switch inside the cabin. After all, DOT does not allow for bright white lights up top with the vehicle in motion. All the wiring for these lights was left in place during the stripping, so it is a matter of reconnecting some loose wires and a little bit of cleanup. Ensuring all works properly, we started the bus once last time and went home for the day.

Weekend Work

The plan was to bring the bus home after soccer on Saturday morning. We were going to spend the weekend scrubbing down the inside of the bus. The flooring is starting to show signs of rust, so we need to get that coated soon.

However, as Proverbs 16:9 states “We can make our plans, but the Lord determines our steps”. When Ivo tried to start the bus on Saturday, only two days after the last light-rewiring and last start….. there was again nothing but silence. Deep sigh and tremendous frustration. After several failed attempts, we agreed the batteries need to be checked.

Autozone confirmed that both batteries have bad cells. Ivo picked up two new batteries for $350 and went to install them. Ensuring all is properly connected, he turns the key….and nothing again!!! After messing around for over an hour, checking all connections, the batteries are brought home and put on the charger. We proceed to clean more bus windows instead, that way we get at least something done…

Overall….

Good progress on the lights, but more frustration in the end. Let’s see what next week brings….

Categories
Demolition

Week #6

Life gets in the way

As much as we would love to have the bus in the driveway and be able to work on it every day, reality is we just can’t. So we are doing what we can when we can around all the girls activities.

We continued cleaning windows throughout the week. Ivo would take a window apart each night. I would clean all the parts at some point during the day around schooling and activities, sometime doing school in the garage while cleaning. Ivo would reassemble it and take apart another one for the next day. And so it goes…

Supplies are starting to arrive

We did make our first big purchase for the renovation of the bus! Costco had a sale on waterproof laminate flooring that we couldn’t pass up. It was ordered the first of February and was delivered last week. Since we are a few months from being ready to install it, the girls helped transfer it from the garage to our bedroom for storage.

We were out of town for the weekend so it’s a short update. Let’s see what this next week brings!

Categories
Demolition

Week #5

Too many parts for a window

We took the windows that were removed last week completely apart to clean them thoroughly. It was a bit nerve wracking on the first one. After all, it IS very hard to find replacements for them. Once the first one was apart, it became much clearer how they are put together. It is rather simple actually! It takes about 45 mins to wash all the parts for one window. And there are 20 windows. Luckily this is something that can be done during the week at home with the bus in storage.

Removing more panels

We brought the bus home over the weekend to finish the removal of the side walls. The remainder of the ceiling supports were removed to get the bus down to bare bones. The side panels are bent underneath the window frames, requiring a grinding tool to get the panels off. All emergency windows had to be removed to allow a grinder to fit under the window frame, since those windows are constructed a little different. We pulled the insulation from behind once the side panels were off. Absolutely amazing how black and dirty it is back there. The bus was covered in black dust after we were done with it. We ended up with several hundred pounds of steel and a bare bus.

Wheelchair track

We were finally able to cut the last bolts on the remaining wheelchair track. Who knew that would be such a long and time-consuming process! The tool we bought on advice from our visitor from Idaho was definitely worth the money. Too bad we had to wait for the tool to cool down after each cut bolt, since that prolonged the completion of this part of the deconstruction considerably. But it worked and thatā€™s all that matters!

Cleaning

The girls started on the cleaning. Even though a lot of the inside of the bus will be covered up, we want to make sure it is nice and clean underneath. N was very helpful to provide the entertainment. She read several books out loud while the girls worked.

Wiring

More wiring was removed from the front fuse panel, which controls the main bus operation. We started the bus, and all seemed fine. Brakes worked as they were supposed to, but now there was no display – no voltage or mileage displayed, no RPM indication and also no speed indication. It seems, once again, we cut too many wires.

Now the hunt for the right wire. We spent the entire Sunday afternoon finding all the wires that had been cut the day before. Then started the process to slowly try to find where they reconnect. And guess what. As it was getting dark and cold, we suddenly noticed there were two wires that had been missed in the reconnection process. They needed to be reconnected to allow the bus to be taken back to storage since tomorrow is a workday and we need our regular vehicle.

The wires got reconnected. The bus became drivable again, and taken back to storage. Now we have to reconvene on the last wiring bits to clean it all up again.

All in all the de-mob is pretty much complete. Time to thoroughly clean and fill the holes in the floor so we can paint it.

Categories
Demolition

Week #4

This week we did not have much time to spend on the bus. Having the bus at the storage facility prohibits spending an hour here or there when we happen to have a gap in our busy schedule. The trick is figuring out what we can do at the storage yard, and what we can bring home to work on.

The World of Windows

We want to ensure that every inch of the bus has been cleaned and all dirt/germs removed from every crack and crevice to the best of our ability. So, we decided to remove all the windows. Not only do we want to make sure that the frames and rails along with the glass are cleaned, but also that they are working properly and are newly painted. This will allow us to be able to clean the frames and install them with a lot more and higher quality caulk then the standard bus is equipped with. This will prevent leakage in the future.

Popping the windows out is fairly easy. They are locked in their frames with four clips and a bead of caulk on the inside of the bus. So just open the window, undo the four clips, cut the caulk with a knife and pull on the frame. We saved the plywood floor parts that we pulled up last weekend to cut up and reuse as blockers where we pulled out a window. This will ensure that rain and dust are kept out while we fix the windows in our workshop at home.

Extras

In addition to the window removal, we removed some more of the wiring as well as several now defunct switches of the main switchboard. After doing some research, we determined that the inside lights should not run off the bus main batteries. If weā€™d be at a campsite for a few days, weā€™d run the risk of draining the starter batteries.

Meanwhile, the flooring for the bus was ordered, as it was on sale. We will be installing waterproof laminate flooring throughout the entire bus.

One step at a time…..

Categories
Demolition

Week #3

With life getting back to normal and being respectful of our HOA, work on the bus is limited to after hours at storage or weekends.

Wiring

The bus we purchased was a handicapped bus with fully functional wheelchair ramp. Though when we purchased it, the wheelchair ramp had been partially removed and fully disconnected, it meant all the wiring for said ramp was still in place as well as various wiring required for the school bus lighting.

The pre-installed bus items we wanted to keep were the dome lights, speakers, door opening/closing, the driver seat fans, the front heater and the air conditioning. All other school (safety) gear, wires, fuses and solenoids were removed. If we were not sure of the function of a wire, we started the bus after disconnecting it. At some point we lost the upper running lights, but fortunately we managed to trace those wires back and get them reconnected.

Luckily, this was something that could be done at the storage yard in the afternoons. Wire removal in this bus is a very long and tedious process. It can be done in two different directions, but we preferred to start from the source and work towards the fuse boxes instead of the other way around.

The removal requires a few simple tools; a box cutter, electrical tape, crimp tool and some connectors. We labeled the wires we wanted to keep with their function, that way we donā€™t have to search for them when we re-assemble the bus. We cut the wires we did not need and coiled them up for re-use in the future.

Cleaning up the auxiliary fuse panel was a day’s work in itself. Trying not to cut or remove anything that could affect the bus operation was a bit nerve wracking. The cleanup of this fuse panel was completed, but the dashboard to main bus fuse panel cleanup still needs to be done.

All in all, we now have 20 lbs pounds less wire in the bus then before we started.

Flooring

Ivo’s younger brother, Niels, came to town over the weekend with his kids. Originally, we were going to go to Galveston for the day to play on the beach, but he brought the pacific northwest weather down with him. Since it was too cold for the beach, and the kids were having a blast just playing at the house, he offered to help with the next phase of demolition.

Flooring was the plan for the day. The linoleum and plywood were dirty and worn. Even with the current cost of plywood, we decided to pull it all up and discard it to ensure we started with a clean bus.

We were very happy with how easy the floors came up. It required disassembly and re-assembly of the driverā€™s seat to get the flooring from underneath, but for the rest – two crowbars and some muscle did the trick.

All nails stayed in the floor, so after removing the plywood we still had to get rid of those as well. The first nail we pounded through with a hammer, but that left a nail head which may be in the way when we put the new plywood in place. Instead, we decided to grind off the remainder of the nails. This would leave less holes to fill and a more solid floor.

To make sure the bottom of the nails would not fall out after cutting the tops, with risk of puncturing tires during a drive, we checked if we could push the cut nails through the floor with a hammer and a punch. All that hammering and pounding proved the nails would all nicely stay in the floor after grinding butā€¦. when we looked under the bus, we noticed all the washers that were not removed after the chair removal nicely lay on our drivewayā€¦.

We also tried to cut the bolts of the last remaining wheelchair track with an oscillating tool. (Advice from up north can very occasionally be taken seriously) It worked like a charm until the cheaper version of the tool we purchased started smoking. Cheap is not always good, but we simply cannot afford all this pretty new DeWalt stuff we see in the do-it yourself videos. Now we need to buy the same tool twice though.

By the end of Saturday, all the flooring had been removed with the flooring smooth.

For the coming week, we have remainder of the wire cleanup and a bus deep clean on the schedule. Weā€™ll see what we can get done.

Categories
Demolition

Week #2

How many days does it take to lock a skoolie?

It is the simplest things that seem to take the longest. Locking a skoolie with so many single pane windows may be a little redundant, but we want to make sure that when the bus is finished, people do not just walk off with our stuff.

Locking the Bus

School bus doors are made of glass inside a metal frame. Between the two doors is a rubber seal that closes off when the doors are shut. We had to figure out how to put a lock on them. Our doors have a small frame at the bottom where the lock would fit. We bought a very nice deadbolt lock for this purpose. To make it burglar proof, we made sheet metal supports for the lock as well. At first instance everything seemed fine. Holes were drilled, lock mountedā€¦. but then it appeared the rubber center seal was too thick to put the receiving end on the other door and make the lock work! Since the bus is in storage and we donā€™t have many daylight hours to work with, the solution was postponed to day two.

On day two, the lock was taken off again. It was moved to the place it should be (drilling new holes in the door) so the mounting on the receiving door could start. Two broken drill bits later and not enough tools on hand to get the broken bits out of the door, the drill was about to embark on a 31ft direct flight through the rear exit. Butā€¦then the thought of having to explain the additional expense of a new drill to the CFO came to mind and thus we decided to just call it quits for the day.

On day three, the two broken bit parts were removed and the receiving end of the deadbolt was nicely mounted on the door. It looked awesome and very clean!!!

However, we discovered that since both doors swing out, there was too much gap between the door and the bottom frame when pulling on the locked door. Basically, you could pull the locked door back and undo the deadbolt by sticking your hand underneath the door and unlocking itā€¦

What a waste of time, drill bits and money on a really nice lock! Sigh.

On day four, a different lock was ordered. Seeing the problems with the first lock, we decided to mount this new lock only once the bus was back in our driveway.

Other Work done at storage

Meanwhile, we kept working on cleaning up the wiring inside the bus. This is very tedious work but needs to be done since there are soooo many useless wires that will be in the way when we run our own electrical system. Each time we have to pull off a ceiling panel to follow where the wires go, we need to undo 120 screws. There are 11 panels in this bus so it is rather time-consuming work. Plus, as we learned last weekend, each time we cut a wire that we anticipate could be connected to the starting lockout we need to try to start the bus and move it ā€¦.

Even though our HOA frowns upon having an RV in the driveway multiple times a month, we decided to bring the bus home on Saturday to make it easier to put the newest lock on. This would also give an opportunity to drop off some insulation and ceiling panels that were removed throughout the week.

Weekend work at home

Day five of locksmithing was the winner. Having all the tools close by and a set of brand-new sharp drills may have been part of that. The doors look like Swiss cheese, but the lock is on, and our possessions are safe!

By end of day, all the cheese holes were filled. After that, R helped remove the last of the wheelchair rails.

Then we took out the last two ceiling panels which turned out to be a family affair. This left no one to take a picture of all of us with our hands in the air like we don’t care.

Meanwhile, Cindy spent 4 hours on both Saturday and Sunday removing decals/wording/adhesive from the back and right side of the bus. Slow but steady progress.

All in all, great progress this weekend. Let’s see what the coming week bringsā€¦

Categories
Demolition

Week #1

As soon as we made it home, we notified our homeowners association of our newest adventure and asked for grace (and a week) to get the bus stripped of all the school signage and lights so it would be legal for us to drive on the road without impersonating a schoolbus.

Sunday: Ivo started stripping the insides of the bus. The seats were mounted with bolts and nuts through the floor, so it took two people to remove them. One in the bus to un-ratchet the bolts and one under the bus to hold the nuts. It was a tight fit under the bus around engine parts and lines. So R jumped at the chance to help and get dirty in the process….

After that, we had to have a talk with the girls about safety gear and appropriate work attire.

Meanwhile, M and Cindy tackled the outside of the bus. All wording and signage had to be removed. Heat was the way to go. The hairdryer wasn’t strong enough, so Cindy pulled out the embossing gun. With heat and scrapers, we picked away at it. Slowly, oh so very slowly….

Sunday night we purchased a new, stronger heat gun and more scrapers.

Monday – Even though sitting on pins and needles Ivo had to wait until schoolwork was complete as well as his own day to day job to be finished to get his helper working again. They removed the last two benches as well the a/c ducts on both sides of the bus. In the end we also emptied the upper dash box in preparation for dismantling. While Cindy and M continued to pick away on the outside…

Tuesday: Removed rear heater.

Ivo disconnected the hoses closest to where they exit the bus. Instead of draining the entire heater of coolant liquid, he put a cork in the end of each hose and used a zip tie to put a Ziplock baggie around the end with the cork, then pulled the hoses out of the bus and looped the hose in order to have the front heater still working properly without losing too much coolant.

We took off the stop arm and solenoid, finished removing all trim pieces and dashboard and removed four of the wheelchair tracks with R. While under the bus, we also removed the heater starter wire from underneath.

At that time, it was discovered that the protective sheet metal under the AC units had come loose. That could have caused a serious accident on our trip! It took three bolts to fix it. Cindy removed the “School Bus” sign from the top rear of the bus and continued removing reflective tape along the side.

Wednesday:

We took safety arm motor off and reinstalled the tow hook afterwards. Removed two ceiling panels (that is a LOT of screws) in order to remove the front top compartment. Doing that revealed many unattached wires, so we cleaned all those up. Disconnected the flashers and consolidated all loose equipment. Later that evening Homeowners send approval for bus to stay through weekend.

Thursday:

Took the ceiling panels in the back off and figured out that the black box in the back is actually the AC control unit. Unfortunately, it will be in the way of the construction plans, so we tried to figure out how to put it in a different location or mount it differently.

R helped to get one more wheelchair track out but discovered one of the tracks had bolts that cannot be reached since they are over the AC vents. We will have to come up with an alternative solution to get that one out…

Cindy scraped the “School Bus” sign off the top front of the bus, as well as the handicap placards.

Friday:

We took a lot of wiring out of the back, as well as the flashers (that make people stop when the door opens) that have to be removed. After cleaning up from that, Ivo tried to start the bus and was met with dead silence…. oops…

Rest of the night was spent trying to correct the issue. In the end Ivo put all loose wire in one big wire nut connected to the ground, and the bus started. Will have to figure out at later date which the actual culprit wire is… The happiness of the fix did not last long though: once Ivo tried to put the bus in drive…. the bus still wouldn’t move! We concluded that the airbrakes were under a safety interlock as the emergency window alarms had been removed.

Saturday:

A nice full day to work on the bus. But that entire day was spent trouble shooting the airbrake problem. Meanwhile Cindy continued removing wording and reflective tape from the outside of bus. At the end of a very frustrating day, Ivo gave up and cleaned and vacuumed the entire bus to at least get the bus ready for storage. IF we could ever get it to move again… It was a very frustrating day, amongst issues losing the door of the electrical panel that was blown off by the wind. Now to find new hinges for that one…

Sunday:

Shopped for some tools while continuing to research how to release the airbrakes. Cindy spent the afternoon continuing to strip the sides of the bus. One side is completely stripped of the tape, but now we have to go back over it with an adhesive remover to scrape the last of the goop off.

By 4 pm, Ivo finally figured out the wiring issue, the air brakes released, and the bus was able to be move!! Yay!! The reflective tape was completely gone from the right side of the bus and the glue goop was cleaned off. By 5 pm, we decided to call it quits and take the bus to storage. What a first week! Did not get the flooring ripped up as we hoped but having a day job and maintaining the homeschooling schedule and activities does not leave many hours to work on the bus.